Design a 3D Box Icon in Photoshop
http://cs5tutorial.net/design-a-3d-box-icon-in-photoshop/

Use Type Tool(T) to add a reffering text like .doc/.psd/.pdf etc. , it depends of what would you want to use this icon.

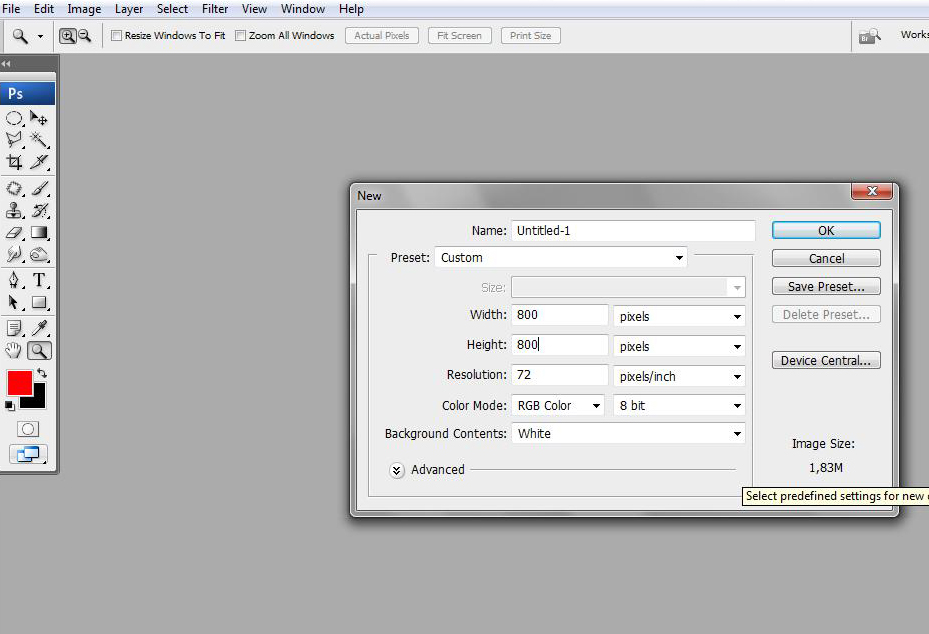
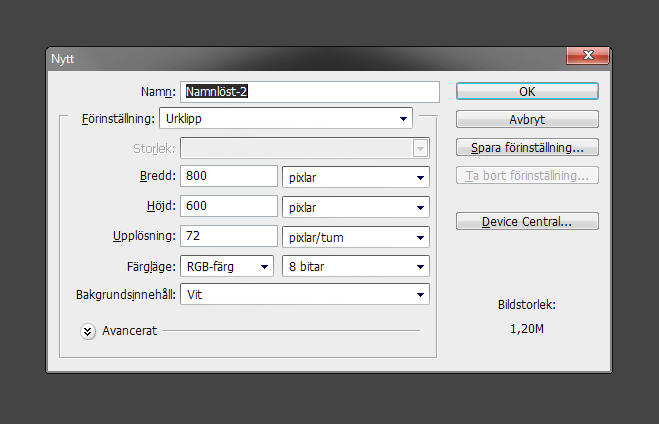
Step 1: Create a new document
Start by creating a new document (Ctrl+N) 800×800 in dimension.Step 2
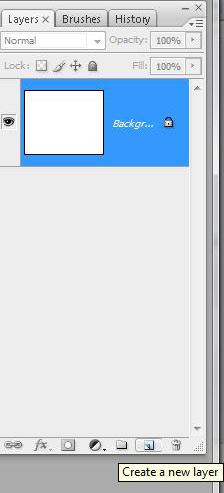
Make a new layer(Ctrl+Shift+N).Step 3
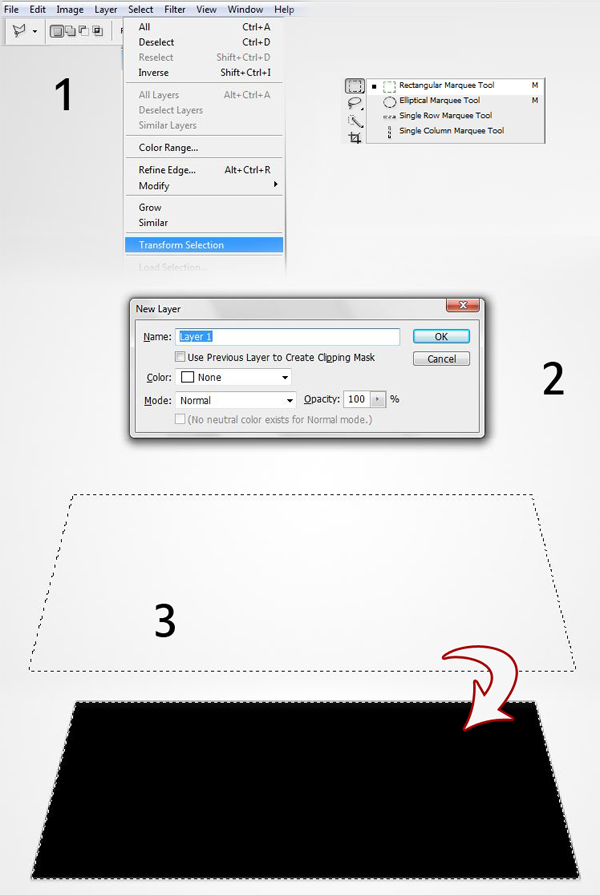
Make a selection using rectangle Marquee Tool(M) and Transform the selection as shown. Fill it with black.Step 4
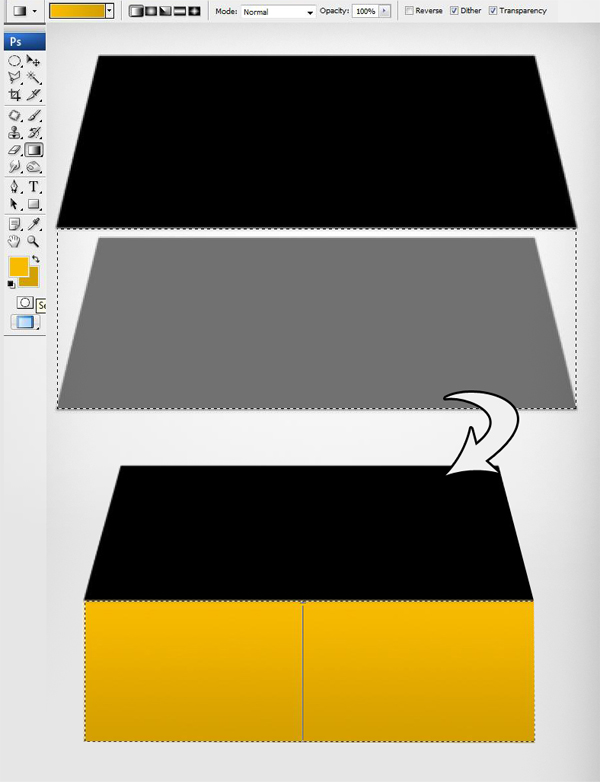
Change the color to grey (Right-click on the layer choose Blending options>Color overlay) and duplicate it. Move the duplicated layer as high as you want (this will determine box’s height). Make the duplicated layer black.Step 5
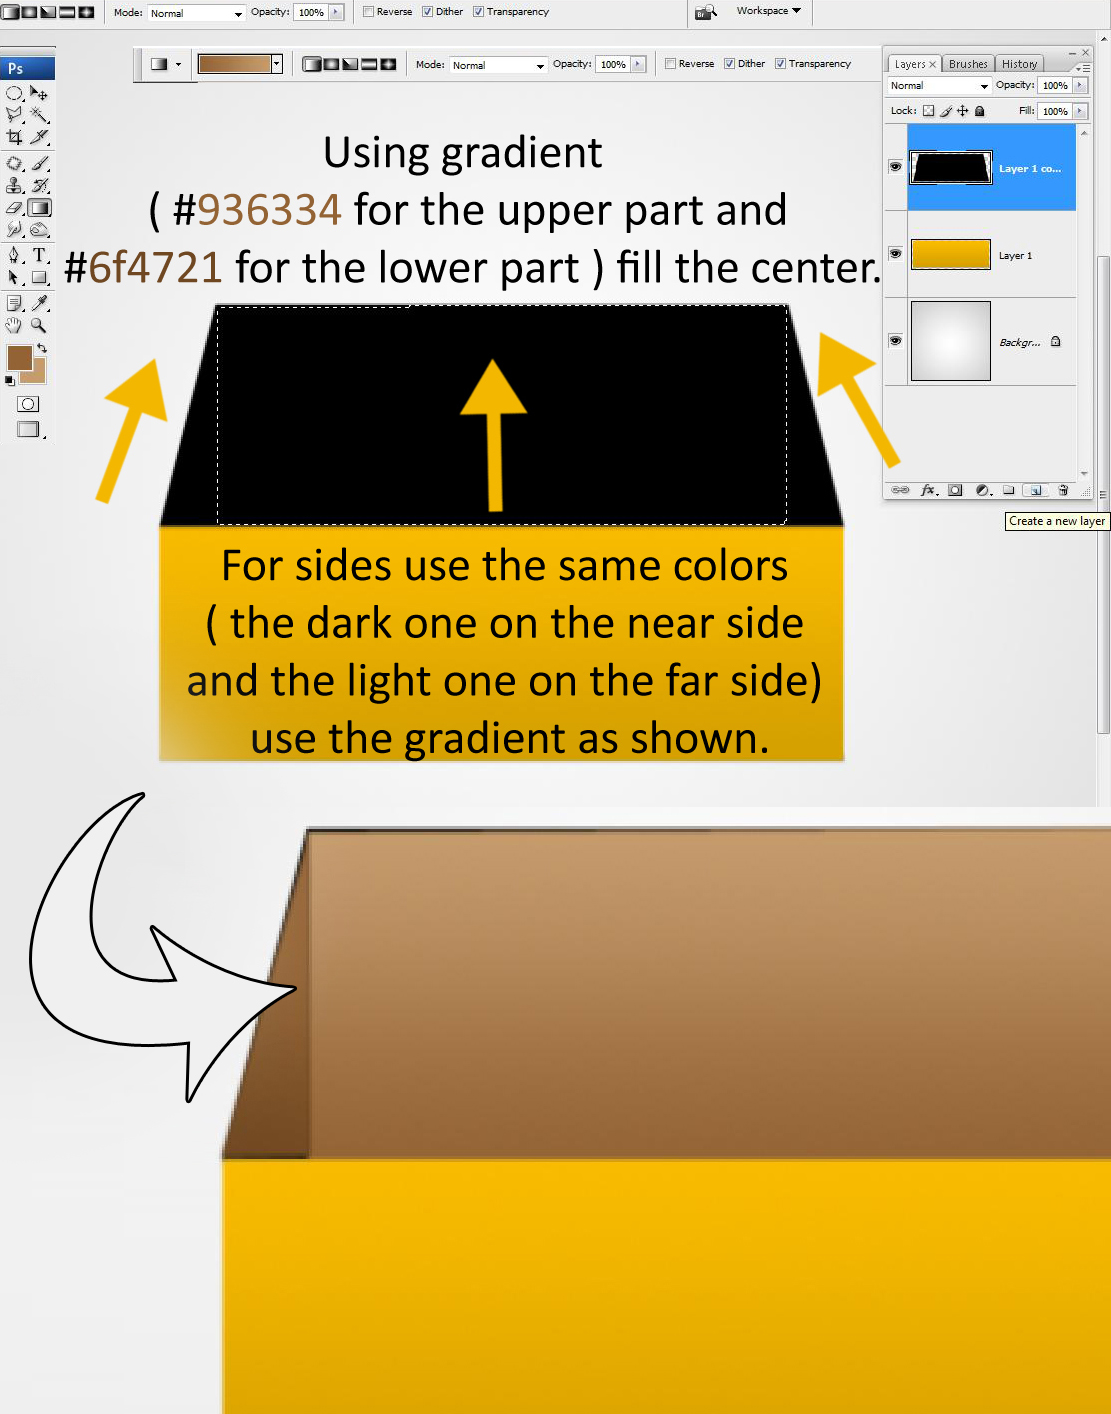
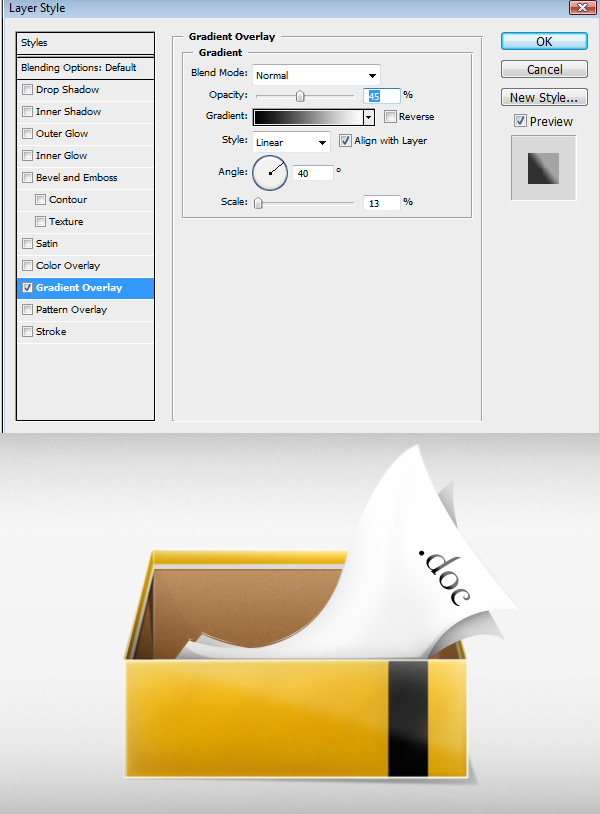
Using Rectangle Marquee Tool (M), make a selection. Make a new layer, fill it with a gradient (Right-click on the layer Blending Options>Gradient overlay) Use a darker color on the lower part and a lighter color on the upper part. For my box, I used #f7bb01 for the upper part and #d3a305 for the lower part. Use shift to make the gradient go straight.Step 6
We are going to fill the interior. Make a selection using Rectangular Tool (U). Make a new layer, fill it as shown. Make a layer for every side you fill.Step 7
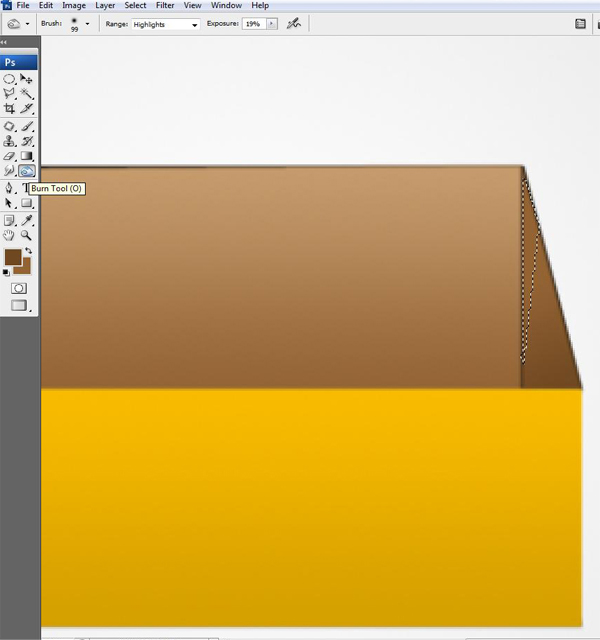
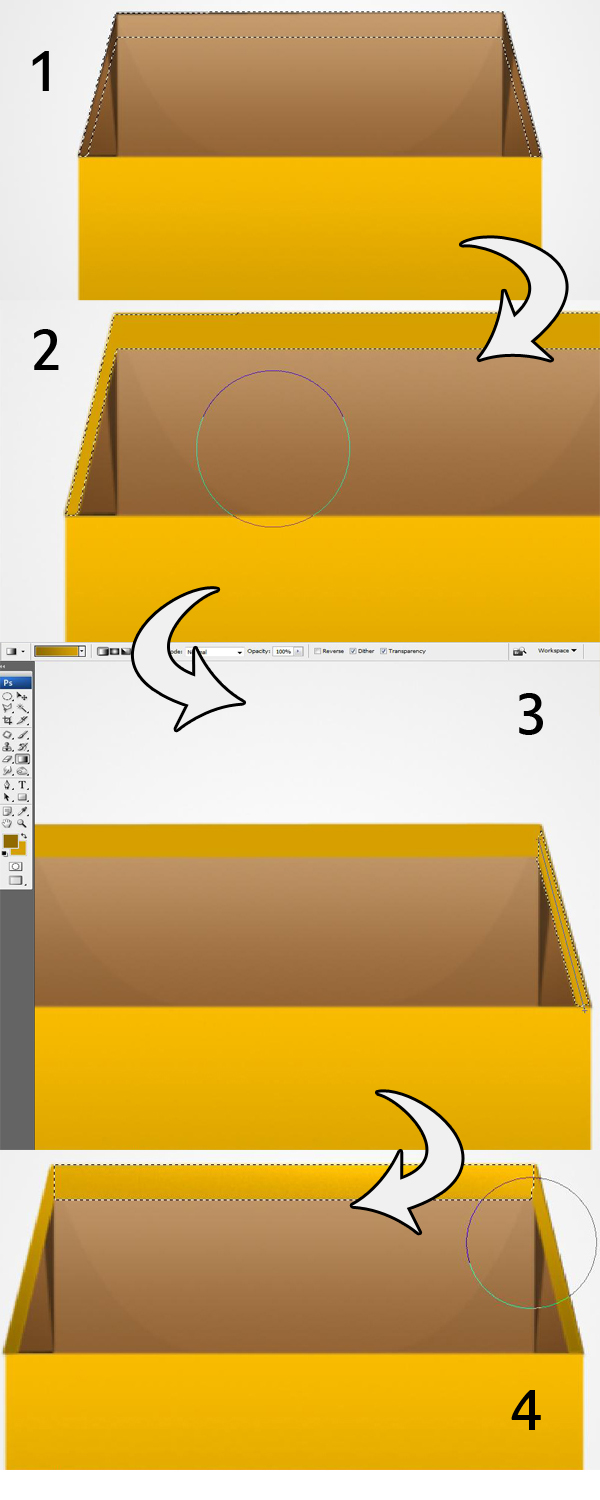
Make shadows for the sides (Use Burn Tool (O) with similar settings).Step 8
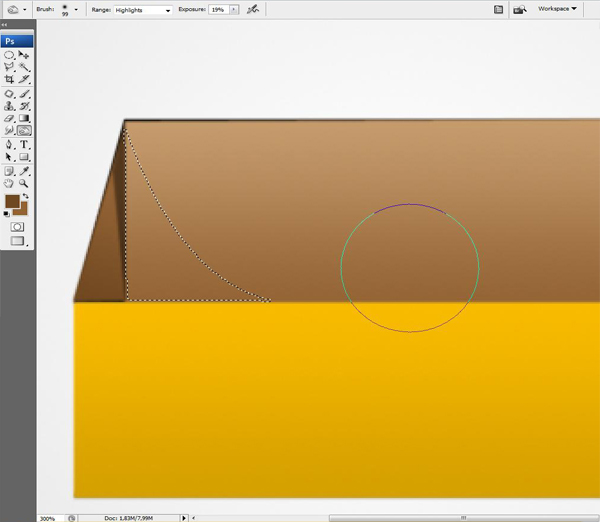
Make shadows for the middle part of the interior. I suggest using a similar selection. Use Burn Tool (O) with similar settings.Step 9
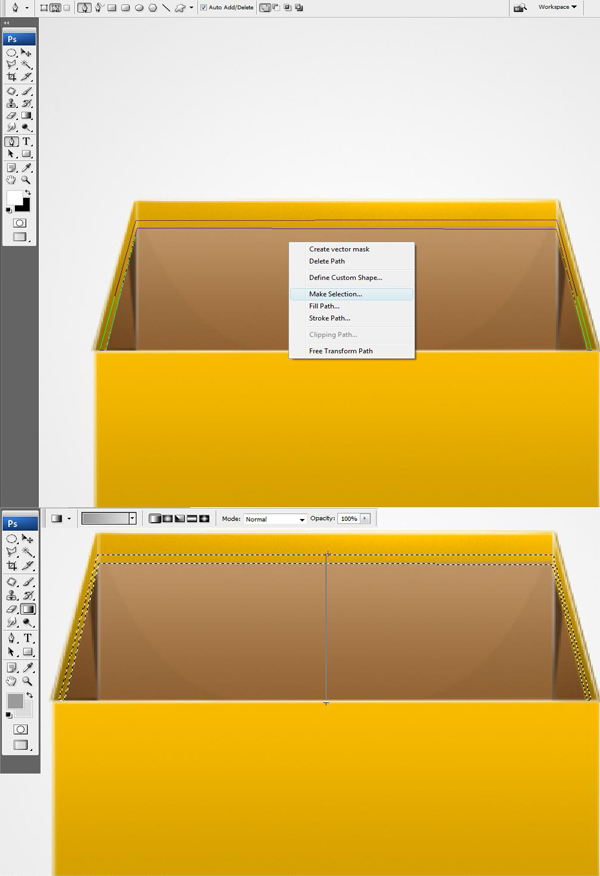
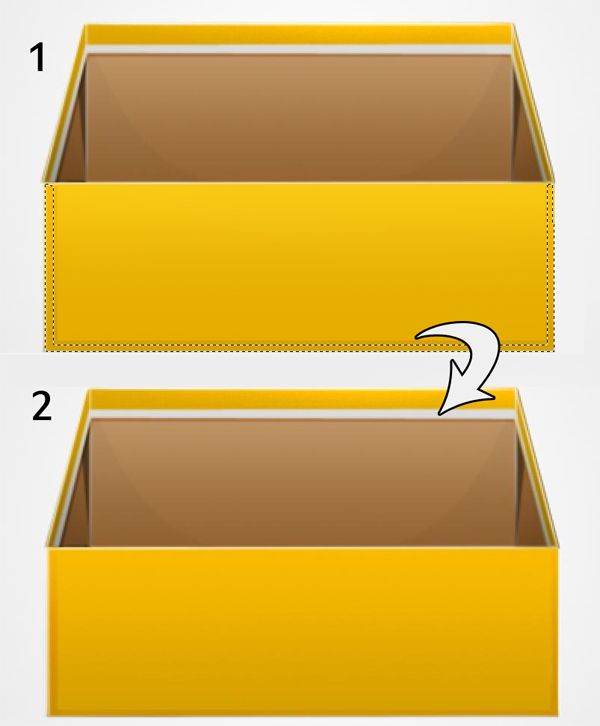
Make A selection similar to the one shown and fill it with the same colors you have used for the box. Make selections and add add a gradient with the same colors used for the box (dark one on the near part and ligther one for the far part) and add highlights for the center similar to the ones shown.Step 10
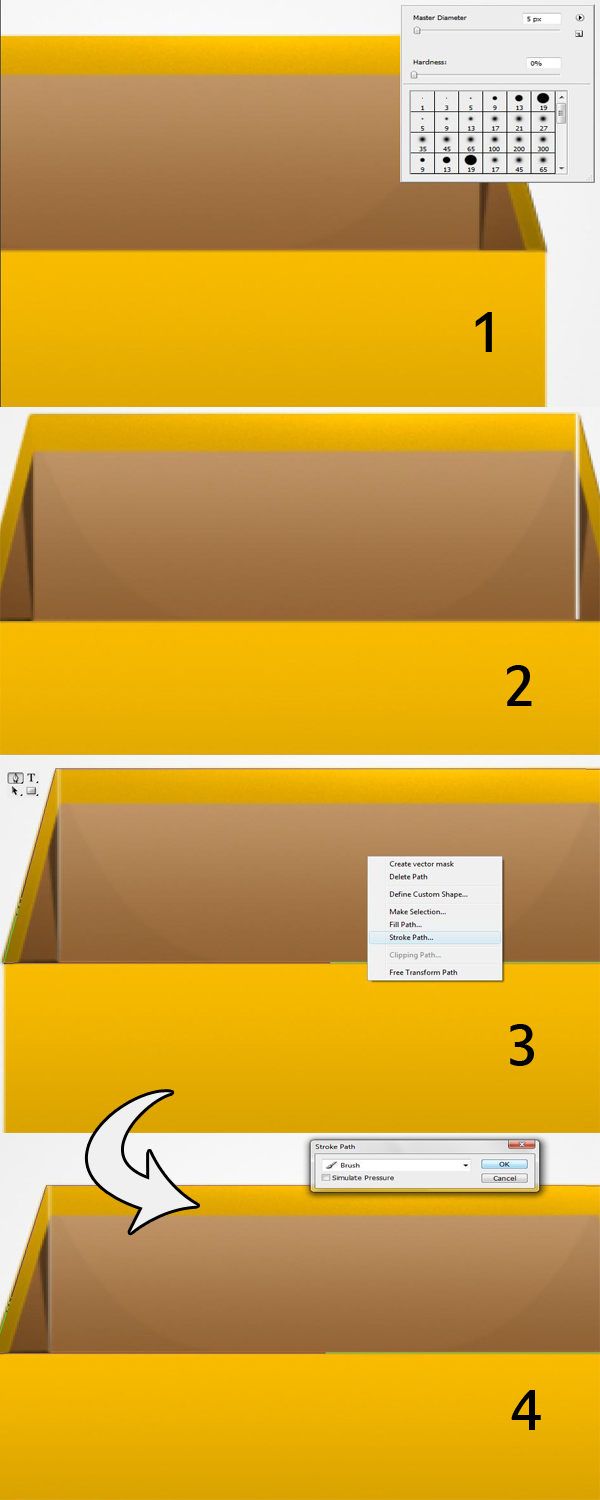
Set your brush to a small size (3px for my size was perfect, 5px was a bit too big). Using Pen Tool, make a straight line on the corners, make a new layer for each line and make a stroke path (Pen Tool (P) — Right Click — Stroke Path — Set it on Brush and press Ok). Using Eraser bring the lines to the right tone. Do the same for the upper part of the box.Step 11
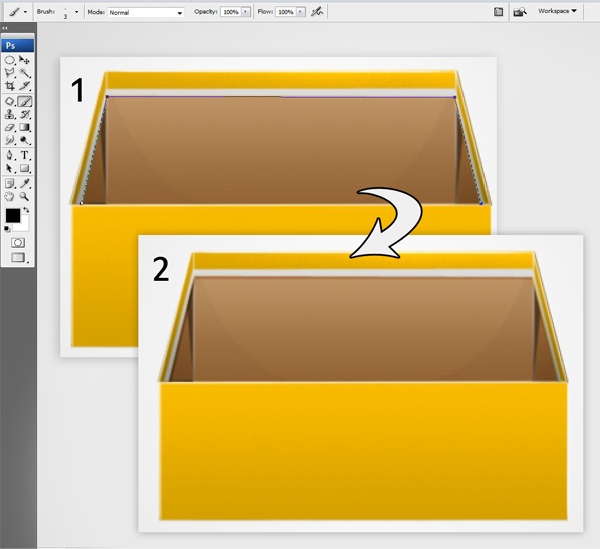
Make a new selection and make a new layer. Using Gradient Tool (G) fill the selection with 2 tones of grey (darker for the close part and lighter for the far part). I used #dcdcdc as a light grey and #9b9b9b as the dark grey.Step 12
Make a new layer and make a shadow using Pen Tool (P) by making a path that follows the form of the interior and using a size 3px (or bigger depending to your image size) stroke the path as shown previously. Use for the color black and set the layer on overlay. Set the opacity as you want (I suggest 60-70%).Step 13
Select the layer of the box and make a selection for a small reflection and using Levels (L) lighten it a bit. Make a small selection as shown for a little shadow on the box and using Burn Tool (O) darken it as you want.Step 14
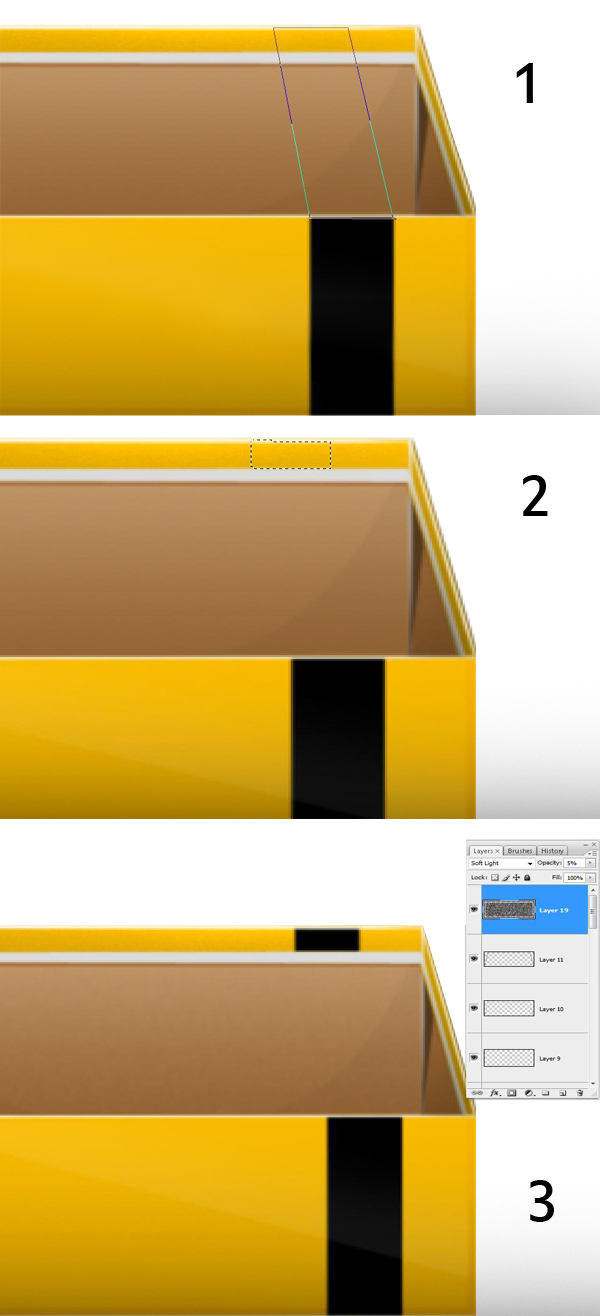
Using Rectangle Tool (U) make a selection for the black line. Make a new layer UNDER the layer of the reflections and fill it with BLACK. Using Pen Tool (P) make a selection to see how will the rear line look. Make a selection and fill it with black where the yellow used to be. To add texture to the interior use Noise (Filter — Noise — Add Noise) on a black layer with the form of the interior (3rd picture). Set the noise on Soft Light blending mode and reduce the opacity of the layer.Step 15
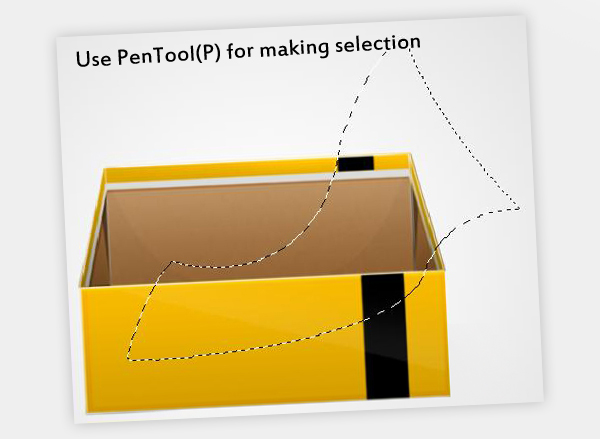
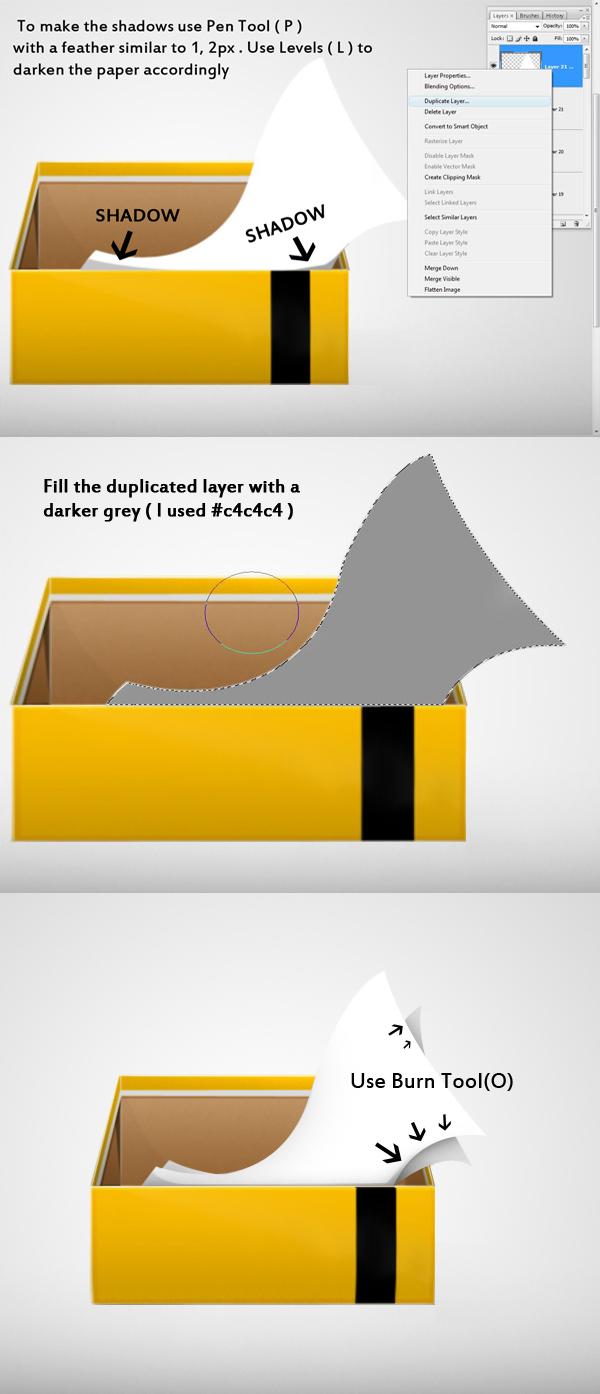
Make a selection for the papers. Make a selection similar to the one shown. Deselect from the selection the front of the box and fill the layer with white. To make the shadows use Pen Tool (P) with a feather similar to 1, 2px . Use Levels (L) to darken the paper accordingly.Step 16
Duplicate the layer and fill the duplicated layer with a darker grey (I used #c4c4c4). Move the duplicated layer under the white paper. Using Free Transform (CTRL + T) rotate the paper. Make a selection and remove from the layer anything that is out of the box.Step 17: Reflections&Shadow
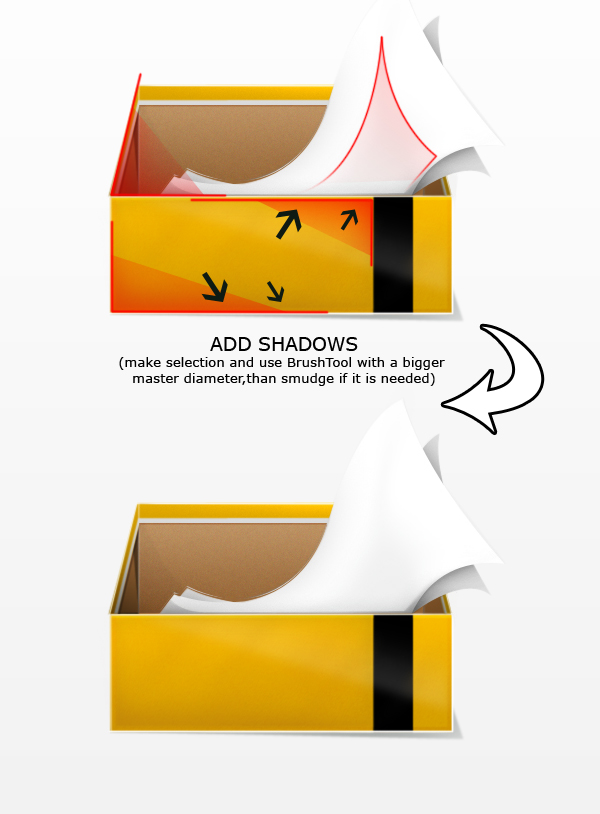
Now comes the nice part. I explained how I added reflections and shadows. You can make them as you wish. To add texture to the front, use Noise (Filter>Noise>Add noise) as much as you want as shown previously.Use Type Tool(T) to add a reffering text like .doc/.psd/.pdf etc. , it depends of what would you want to use this icon.
Final Result
Firefish Photoshop Tutorial
http://cs5tutorial.net/firefish-photoshop-tutorial/
Editors Note: Non-English Pictures
Some images in this post show a non-english version of Photoshop. This should not affect your ability to complete this tutorial as all settings should look exactly the same.Step 1
Step 2

Step 3
Step 4

Step 5
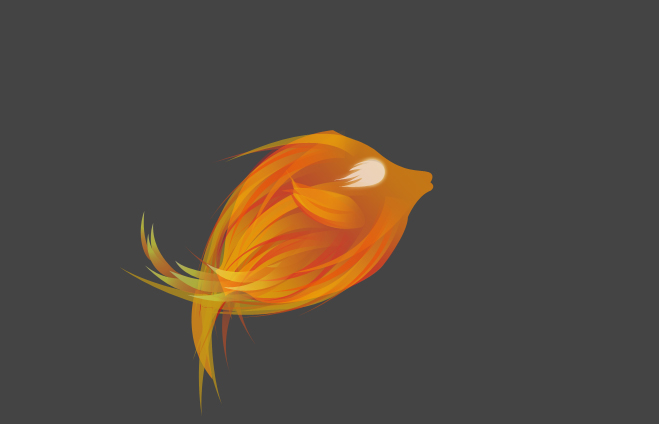
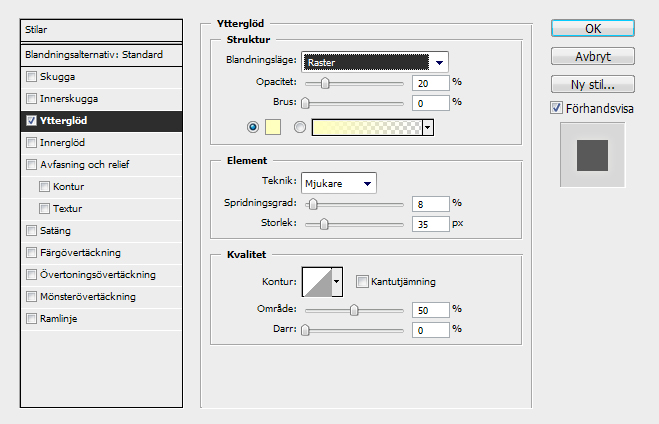
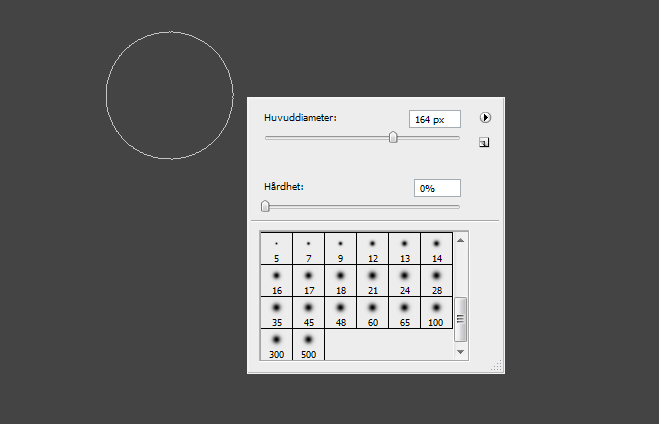
Now we are going to make the eye of the fish.
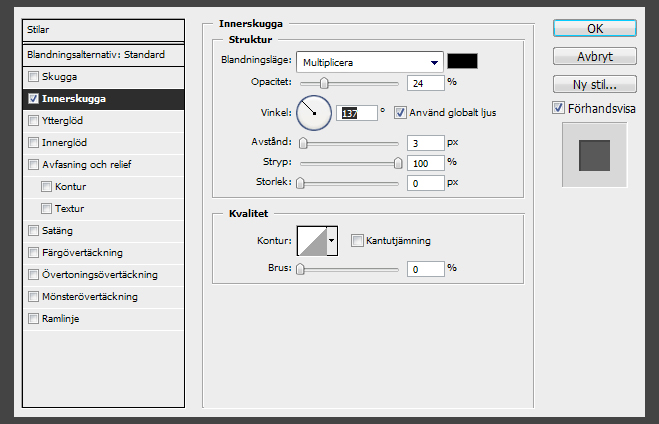
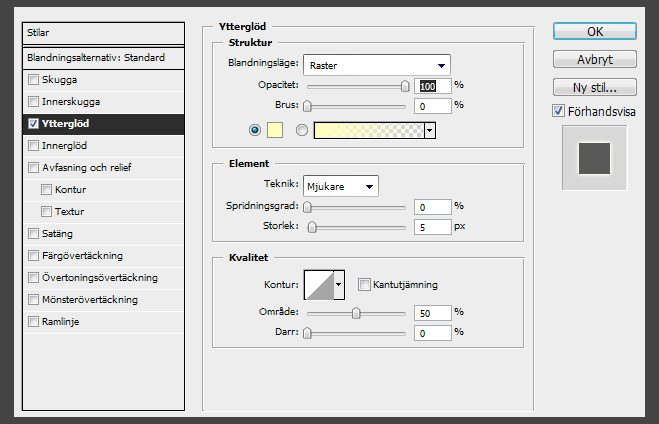
Open the layer styles and apply this styles

Step 6

Step 7

Step 8
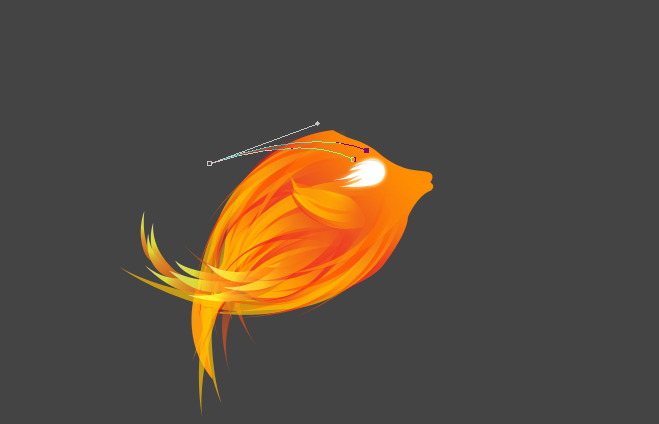
Now we are going to set our body on fire using pen tool (I know, funny choice of words).
Step 9
Repeat step 8 about 18 times using different shapes and colors.


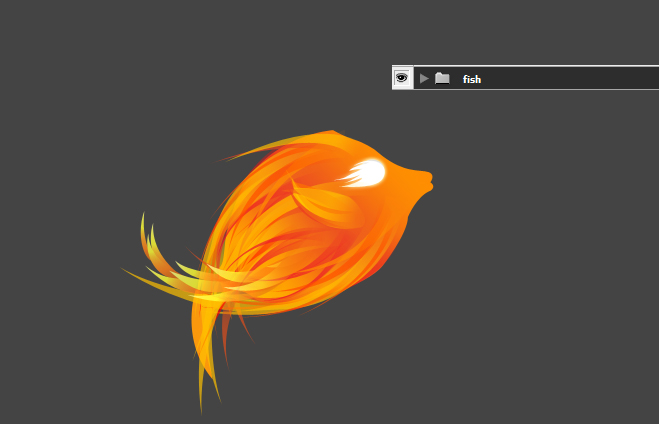
Step 10
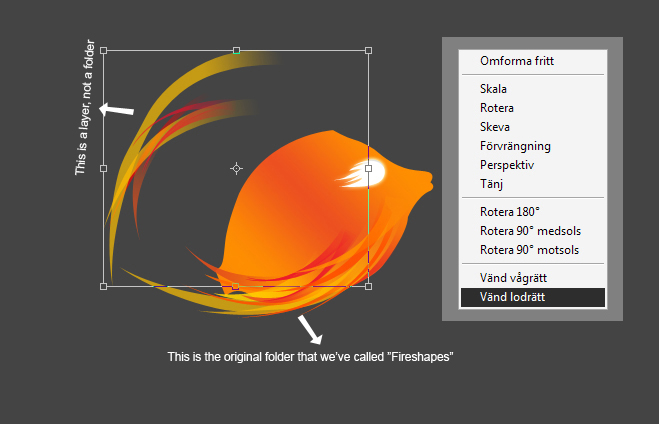
Now put it above the fish

Step 11
Now repeat step 10, rename this layer to “Fireshapes3″ and put it above “Fireshapes2″. Now lets add a yellow shape on the bottom using pentool to make this fish look a little bit more like a fish.

Step 12
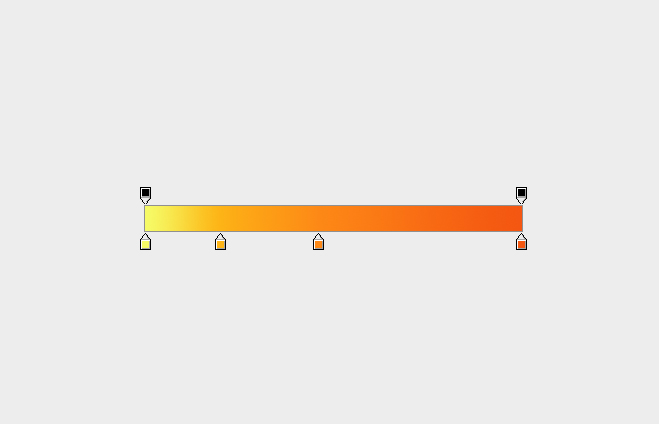
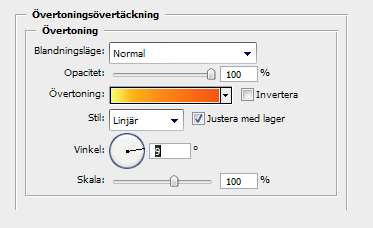
Step 13
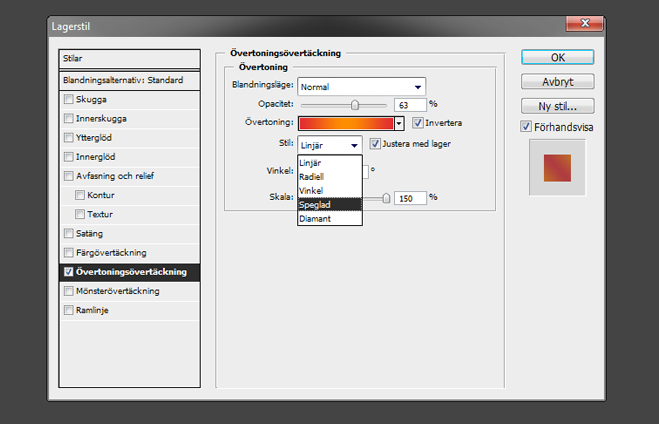
Now you know the technique of making fire-shapes using pen tool. I’ll be adding some shapes with gradients(step 12 for gradient settings) on the tail that I’ll put in a folder and rename it to “Tail”.
Step 14

Step 15

Step 16

Step 17
Now lets add some shapes above the fin to make it more “firey” using the same technique as in step 16.

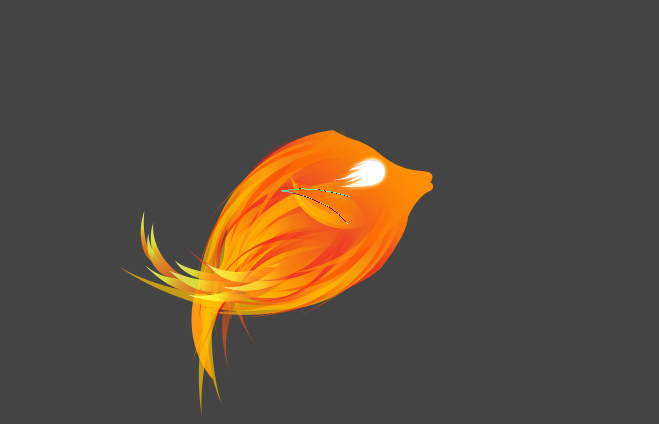


Step 18
Step 19

Step 20
Step 21
Step 22
Step 23

Step 25

Step 26
Step 27

Step 28

Step 29
No we are up to make the background.
Step 30

Step 31

Step 32

Step 33

Step 34
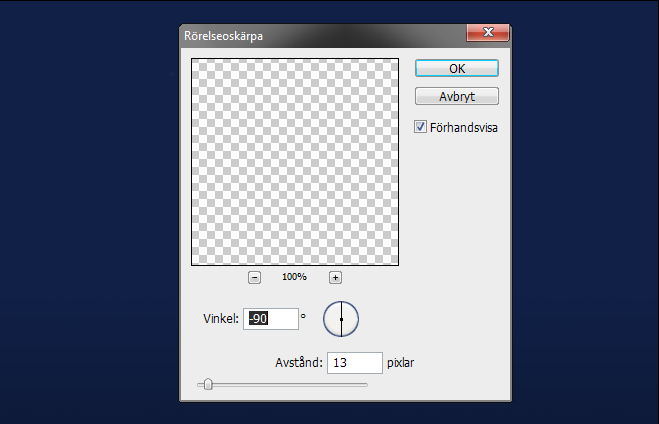
Now go to Filter > Blur > Motion blur and apply these settings(you need to do it twice, once for the x-axis and once for the y-axis):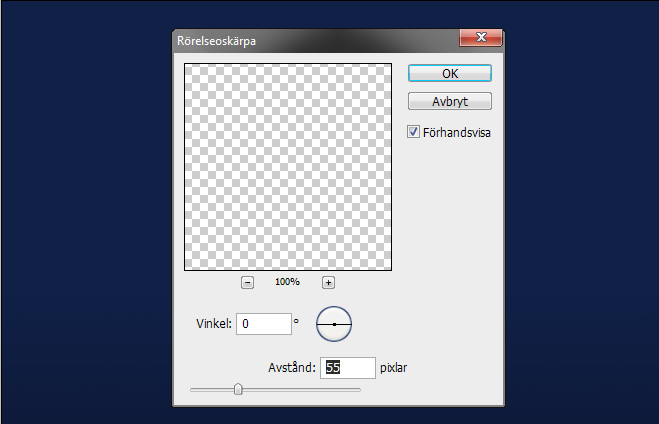
Step 35

Step 36

Step 37

Conclusion

